Hardwood Floor Refinishing
A well-trained refinisher can provide your dream floors in a day or two. They can also keep the odor to a minimum by using large fans to pull fresh air in and push sand dust out.

Hiring Hardwood Floor Refinishing Bergen County NJ can save you money and time. Look for an NWFA (National Wood Flooring Association) certified floor expert.
While sanding hardwood floors may sound like a daunting task, it’s something any homeowner can do with proper planning and equipment. A good quality drum sander will work best for most homes, though you might consider renting a specialty sanding machine with a flat head to reach tight spaces around radiators and corners. Whatever you choose, it’s important to take the time to read up on your sanding machine and any associated safety gear before you start.
After sanding, use wood putty to fill any gouges or major scratches on your floor. Be sure to let the putty dry for at least 24 hours, then sand again with a fine-grit sandpaper to create a smooth surface. It’s also a good idea to brush the edges of your floor with a soft-bristled brush, which will help prevent splintering.
During this stage, you’ll likely produce a significant amount of dust, which you’ll need to collect and dispose of properly. Before re-sanding, make sure you vacuum the room thoroughly and then sweep it clean, paying special attention to moldings and corners. Also, be sure to wipe down the walls and baseboards with a damp rag before you move on to refinishing.
The next step is to sand the entire floor again, this time with medium-grade (60-grit) sandpaper. This will remove any rough spots from the previous sanding and prepare your floors for staining. Be sure to sand the edges of your room, too.
When you’re done with this step, vacuum the room again and then sweep it clean. This will ensure that there is no lingering wood dust, which could fall on the new finish during the staining process. Also, be sure to vacuum the room and then wipe it down with a damp rag again.
Although refinishing your hardwood flooring can be expensive, it’s one of the most cost-effective ways to give your home a fresh, new look. Plus, you’ll get to enjoy your beautiful new floors for a long time. And, if you’re willing to spend the money, you’ll find that hardwood is more durable than other types of flooring and lasts much longer.
Staining
Staining is another critical step in the process of refinishing hardwood floors. Wood stains are available in both oil-based and water-based form and come in a large variety of colors that can be used to match the color of walls and furniture. It is important to choose a stain that is designed for use on hardwood floors and that it contains low-VOC.
Stains work to accentuate the natural beauty of the hardwood and can be used to create a dramatic or neutral effect in any room. Staining also helps to hide minor scratches, dents and gouges that might be present in your wood flooring.
The first thing that needs to be done before staining is to clean the floor. Vacuuming the floor and using a degreaser to remove any dirt or grease that has accumulated on the surface of the wood is crucial. This will help ensure that the stain adheres and doesn’t pull up any of the existing finish.
When it comes to deciding on a stain, it is a good idea to choose one that will complement the overall design of your home and that will blend well with any existing furniture or accent pieces. It is also a good idea to keep in mind that different species of hardwood react differently to stains. This can result in the grain of the wood appearing blotchy if a stain is applied that does not work with the specific characteristics of the hardwood.
After the stain has dried, it is a good idea to apply a polyurethane top coat. This will help to protect the floor from future damage and will add a bit of shine to it as well.
When applying the polyurethane, it is important to follow the manufacturer’s instructions for application. A lambswool brush is generally the best tool to use, as it will leave a much smoother finish than a rag or towel would. It is also a good idea to wait a few hours before walking on the floor to allow it to fully dry.
It is also a good idea to stain over the top of any major scratches, dents or gouges that cannot be repaired by trowel filling after sanding. This will help to disguise these imperfections and will make the repair process easier for your contractor.
Sealing
If your hardwood floors are dingy and scratched, refinishing can help. But it can only go so far. Sealants can add much-needed protection from daily wear and tear, reducing the amount of time it takes to get them back to looking like new again.
Before sealing your floors, make sure that the room is well-ventilated and that you have on a dust mask to protect yourself. Many wood finish products emit harmful vapors, so you want to avoid breathing them in.
Choose the type of sealer that will work best for your floor. There are a variety of options, from oil-based to water-based polyurethane. The best choice for your floors will depend on what they are made of, how much foot traffic they receive, and how easy it would be to stain them in the future.
Penetrating sealers (such as tung oil) soak into the pores of the wood, helping to prevent scratches and other damage. They are not as durable as other finishes, however, and a coat of wax is often applied over the oil for extra protection.
Oil-based polyurethane has a sheen that is more attractive than other types of finishes, but it can yellow over time and may require more frequent reapplying than other products. Water-based polyurethane, on the other hand, doesn’t yellow as fast and can last for up to 10 years before it needs to be reapplied.
Whatever product you use, test it out on an area of your floor before applying a full coat. Make sure that it doesn’t give off a strong chemical smell and that it isn’t too thick or thin for your taste. It is also a good idea to test the color of your floor with the sealant before you apply it to the entire surface.
As you consider your options for refinishing or recoating your hardwood floors, take the time to do some research and find a reputable contractor that will provide excellent results. Look for a company that is licensed and insured in your area, and check the Better Business Bureau to see how their customers have fared. It is best to hire a contractor that specializes in hardwood flooring. These professionals are familiar with the process of sanding, staining, and sealing and can complete it quickly with minimal interruption to your home life.
Installation
Hardwood floors are a great addition to any home. Not only do they look beautiful, but they also add value to your home and can make it more appealing to potential buyers. However, hardwood floors can become damaged over time and may need to be refinished or resealed.
Refinishing and resealing are the two most common types of hardwood floor repair. These services protect the flooring from moisture and sunlight and can enhance the color of the wood. Refinishing is more expensive and takes longer than resealing, but it can restore your hardwood floors to their original beauty.
When choosing a contractor to refinish your hardwood floors, make sure they have plenty of experience and are licensed and insured. Ask for references from previous clients and check their online reviews. A contractor with good reviews should be able to provide you with an estimate within 48 hours.
The type of wood used for your floors is another important factor to consider. Solid hardwood can be refinished multiple times over its lifespan, but engineered wood may need to be replaced sooner than solid wood. Additionally, you should take into account your local climate. If the humidity is high, solid wood will swell and shrink with it, which can lead to cracks and splits. Engineered wood is less sensitive to changes in humidity and will stay more stable.
Refinishing your hardwood floors will increase their longevity and make them more attractive to prospective buyers. A professional can help you choose the right stain color for your home and make your hardwood floors look brand new again. You can even use a product like Rejuvenate Wood Floor Restorer to refresh your floors without the need for sanding.
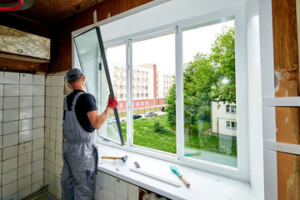
The Basics of Replacing Windows
The first step in replacing windows involves removing the old window sash and hardware. Before you start, check the frame for lead paint; remove and dispose of it properly if necessary.
Measure the width and height of the opening to make sure a replacement window will fit. A high-quality contractor will order a replacement window about 1/4 in. smaller than the existing frame to ensure it will square up vertically and horizontally. Click https://www.kelemerbrothers.com/ to learn more.
The cost of replacing windows is a major factor for homeowners. The cost is determined by several factors, including window frame material and window design. Fiberglass frames are usually the most expensive, but they offer energy efficiency and durability. Wood frames are cheaper but may need regular upkeep. The style of window also plays a role in the price, with more complicated designs typically costing more. Some styles are more structurally complex and require more materials to install, such as bay, awning, or casement windows.
The location of the home can also drive up the cost of replacement windows. Homes located in historical districts often need custom windows that meet preservation codes. In some cases, the window replacement project requires new framing and additional insulation to ensure that the structure is safe and meets current building codes.
Choosing to include energy-efficient upgrades in the window replacement project can increase up-front costs but can save money on utilities over time. This can include weatherstripping, caulking, and insulation. These upgrades can make a home more comfortable and increase the value of the property.
Gaps and cracks around a window frame can let in drafts, which can raise utility bills and cause damage to the structure of the house. Replacing a cracked or outdated window with a new one can help to reduce these problems.
New windows can improve the look of a home and can increase its curb appeal. They can provide better ventilation and can cut down on noise and fading from the sun’s ultraviolet radiation. Many newer windows are designed to meet energy-efficiency standards, which can also reduce a homeowner’s utility bills and carbon footprint.
If you’re considering replacing your windows, it’s best to hire a professional contractor to do the work. They have the skills, tools, and materials needed to install a quality window replacement quickly and efficiently. Attempting to do the work yourself can be very dangerous and lead to costly mistakes. It’s also a good idea to choose a local company that can address any issues that arise and is familiar with the local regulations and codes.
If your windows are old or poorly insulated, they can let drafts into the house, forcing your heating and cooling systems to work overtime. Replacing them with new, energy-efficient windows will significantly lower your home’s energy bills. Energy-efficient windows also provide a number of other benefits, such as increased comfort, improved aesthetics, and reduced noise.
In addition to energy efficiency, high-quality replacement windows are made with environmentally responsible manufacturing practices and recycled materials. As a result, they have minimal impact on the environment and contribute to sustainable development. Moreover, they can help you to meet future energy efficiency standards and increase your chances of selling your home in the future.
However, whether energy-efficient windows are worth the cost depends on the type of windows you choose and how much energy they save. In general, double-pane windows with insulated vinyl frames offer the best bang for your buck. According to Remodeling magazine’s 2024 Cost vs Value report, these windows can increase your home’s value by $13,766.
Whether they will pay for themselves in energy savings depends on several factors, including how cool or warm your home is and the amount of time that passes between each change in utility bills. In general, you can expect double-pane windows to reduce your energy bills by 15-25%.
In order to get the most out of your replacement windows, be sure to hire a professional installer who will ensure that they are properly installed and sealed. Leaving even one gap around the window will compromise their energy efficiency and allow drafts into your home.
The most effective way to improve your windows’ energy efficiency is to replace them with high-performance ENERGY STAR windows. These windows are engineered to minimize air leaks and are made with an insulating coating that reflects heat back into the house during winter and keeps it out in summer.
Alternatively, you can also improve your windows’ energy efficiency by sealing them and caulking any cracks or gaps. Another great option is to install window treatments that are designed to keep out harmful UV rays while still allowing natural light into your home. Schedule your commitment-free consultation with Blinded by Delight to upgrade your windows with beautiful, energy-efficient window coverings today!
The style of your windows is something that can add to or take away from the overall appearance of your home. Changing your window styles is an excellent way to give your house a facelift without spending a fortune. It can also improve the functionality of your home by allowing you to open and close them more easily.
You can choose from a variety of window options, including double-hung, casement, and awning windows. There are also many customization options, such as grids and hardware finishes, to help you create a more personalized look. You can even get a bay window to provide more living space and spectacular views.
Newer replacement windows can also offer improved security, lower utility bills, and a more comfortable environment. They are designed with modern materials that make them less likely to leak or fade over time. These improvements make them a good investment for homeowners.
Older windows often allow heat and cold to escape, leading to high energy bills and a less comfortable home. Newer windows can be glazed with a material called Low E glass, which blocks UV rays and keeps your home at a more stable temperature. They are also easier to clean and require little maintenance.
If you are considering replacing your windows, it is important to do your research to find the best style and color for your home. Many companies offer windows that match the color of your home and are easy to maintain. Fiberglass and aluminum cladding are popular window material choices because they don’t need to be painted or stained, and can last for decades. It is a good idea to consult a professional window installer to ensure your windows are properly sized and installed. It is also a good idea to remove all the window treatments before the installation date. This will ensure that your new replacement windows are a perfect fit.
There are many ways to improve your home, but few bring as much return on investment as new windows. They can add beauty and value, while also saving on energy bills. When installed properly, replacement windows form a tight seal to eliminate drafts and hot or cold spots. And if you choose ENERGY STAR-certified windows, they can save on energy costs and protect the environment.
While it is possible to replace windows yourself, it is usually recommended that you hire a professional window contractor. They will be able to help you make the best selection for your needs and can install them in accordance with all applicable laws and regulations. A quality contractor will also ensure that your windows are correctly installed, which is important for the integrity of the frame and seal.
Aside from aesthetics, there are many other reasons to consider replacing your home’s windows. Perhaps one or more of your windows are difficult to open, or maybe you have noticed an increase in your energy bills. In addition, windows that do not adequately insulate your home or block out noise can have a negative impact on your quality of life.
The first step to getting your home ready for window replacement is to remove any blinds, shades or curtains from the existing windows. This will make it easier to install your new windows, and will also prevent any damage from occuring during the removal process. Once the old windows are removed, prepare the frame and sill for installation by filling in any gaps with caulk or putty. Also, be sure to caulk around the sash weight pockets and insulate the pocket with spray foam before installing the new sash. You can also apply a coat of paint or stain to the exterior casings and trim to match your new windows. It is also a good idea to remove the existing window hardware and replace it with new hardware for a more uniform look. Lastly, you will want to clean the window frame and glass before installation. This will help to prevent any future damage from occurring due to dirt or other contaminants.
Planning For House Painters
House painters are in demand because homeowners frequently repaint their homes to maintain their value, and curb appeal, and protect against moisture damage. It is generally recommended that exterior painting be done every five to ten years.

Professional house painters can offer advice on color choices, paint types, and finishes to create a cohesive aesthetic. They also know how much paint to purchase to ensure they do not run out or have too much left over. Contact Painter Fort Lauderdale for professional help.
When hiring a house painter to prepare and paint the interior of your home, there are several things that you can do in advance to help make the process smoother for everyone involved. This will ensure that the finished product looks great and is long-lasting.
Most house painters will start by washing the walls to remove any dirt or grime that has built up over time. They will also do their best to prep the wall by filling in any holes or cracks and sanding down areas that have texture or are bumpy. This will help create a even surface for the paint to adhere to.
Some house painters work alone, either as one-man shows or as small family businesses with a few employees. They usually get business from word of mouth or from the internet. They will often have some kind of website and social media page where customers can leave testimonials and reviews. They will likely have a fairly low price point and be able to provide a quick turnaround for their services.
Other house painters may work for larger painting companies. These tend to be more regulated and take their business more seriously than the one-man-shows. They will have insurance, customer testimonials and pictures of past projects. They will probably have a mid-range price point and be able to offer a more complete and thorough service than the one-man-shows.
You should always ask your house painting contractor what they expect you to do in terms of prepping the space before their arrival. For example, some contractors will ask you to move furniture out of the way or cover it with drop cloths to protect it from paint splatter. It is best to find this out in the initial meeting so there are no surprises down the line.
In addition to preparing the surface for painting, it is important to properly ventilate the room and run fans to speed up the drying process. It is also a good idea to open windows and doors to allow for fresh air circulation throughout the space. This will help ensure that the paint dries properly and that no moisture damage occurs.
Equipment
Painters must be able to work standing up and moving their upper body for long periods of time. They should also be comfortable working with materials such as caulk, putty, plaster, stains, and chemicals that can be messy and emit strong odors.
The equipment a house painter uses includes brushes, rollers, tape, ladders, and cleaning supplies. A good quality brush makes it easier to make straight lines and cover large areas. Rollers come in different sizes, some of which are designed to reach higher ceilings and walls. A high-quality ladder is essential for getting to those hard-to-reach spots, and a pressure washer can be helpful in cleaning off gunk prior to painting.
When hiring a house painter, you should ask for a detailed estimate that covers labor, materials, and paint. This should be done at the beginning of the job to avoid any surprises down the road. It is also important to ask the painters about their preparation process and cleanup procedures. This will include whether they will protect your landscaping and cars if doing an exterior painting, and what they will do if they accidentally get wet paint or old paint chips on your belongings.
Many house painters are self-employed, either working as solo contractors or running small businesses that employ other painters. This is a common career path for people with trade backgrounds, such as carpenters or plumbers, who choose to focus on painting full-time. These painters often have a wide range of experience and can provide references from previous clients.
Another option is to hire a larger painting company. These companies tend to take themselves a little more seriously than the one-man-shows, and they should have valid insurance and customer testimonials on their website. They will likely have a team of 3-4 painters, so that they can complete projects more quickly than a single individual would be able to do.
You can find a house painter by searching online or asking your friends and neighbors for recommendations. Some of them may even be able to give you examples of past jobs that they have done, and some will post photos of their completed work on their websites. Regardless of how you find them, it is crucial to interview several candidates before making your final decision.
Safety
House painters must be competent in the use of brushes and rollers, but they also need to know how to work safely on ladders. This means ensuring that the ladder is secured and in good condition before using it, and taking care not to fall off or drop tools. It also means keeping the workspace tidy and covering areas that are not being worked on with plastic sheets to prevent dust escaping. Paint and other renovation materials generate dust and fumes which can cause respiratory problems. It is therefore important for painters to wear masks and gloves, to avoid eating or drinking while working in the area, to keep their workspace clean, and to use wet sanding, chemical stripping, infrared equipment or vacuuming to reduce airborne dust.
The use of power tools creates an additional hazard and a house painter should be trained to properly operate these machines. They should also be familiar with the dangers of working with electricity and understand how to keep circuit breakers and outlets secure and in a safe location.
Many painters are self-employed, so it is up to them to ensure their own safety while on the job. They should have written health and safety policies and carry out risk assessments for each job they undertake. These should be reviewed regularly to ensure that they continue to provide effective protection against the risks involved.
A house painter must be capable of working for long periods of time standing, stooping, reaching and stretching. They may also need to be able to climb ladders, and they should be accustomed to working in small spaces and tight corners. They should be able to follow instructions and take their time to do a quality job without rushing or cutting corners.
If you are looking for a house painter, try to get a referral from a real estate agent or from friends and family who have used them before. This way, you can be sure that they are reputable and will do a great job. You can also ask the painter for references and look at their previous work.
Cleaning
Painting is a messy job, and a professional house painter should always plan ahead for cleaning. They should make sure that they have a staging area where they can mix, keep and pour their paints as well as a spot where they can clean their brushes and rollers without getting them on items in your home that you want to remain paint-free, such as furniture and clothing.
It’s also important that they properly dispose of any materials they use, such as paint chips, and keep all their supplies organized. They should also take precautions when removing old paint from surfaces to avoid getting it on themselves or their equipment. This includes using a respirator when working with sandpaper and other sharp objects, as well as wearing rubber gloves when handling potentially hazardous materials like caulk or putty.
Depending on the type of surface being painted, different chemicals or processes are required for cleaning it. Some surfaces may be greasy and need a chemical degreaser, while others may be mildewy and require a water and bleach mixture. A painter should always test any cleaning solution on a small area of the surface they’re planning to work on to ensure that it won’t damage or discolor the new finish.
In addition to using proper cleaning techniques, a house painter should always keep their tools, supplies and trash confined to the staging area of the project so that they don’t leave any mess behind when they’re finished. This includes keeping any leftover paint in cans, putting away any brushes and rollers they’re using and removing any tape from the surfaces being painted. They should also make sure to clean up any spills as they occur, as they can be difficult to remove once the paint has dried.
A good house painter will do everything they can to prevent a mess while they’re working in your home, but sometimes mistakes happen. If you notice any of these signs in a house painter’s work, it’s best to look elsewhere for your next project.